How to run Mongo Express using ArgoCD?
In this tutorial, I will explain how to use YAML files in ArgoCD to deploy a Mongo Express Application with Continous Delivery.

This is 3rd part of 3 part series tutorial. In , this part I explain how using Argo CD you can deploy a mongo express app with a mongo database with continuous Delivery.
Prerequisites:
- Kubectl configured
- A Github account
- Argo CD Installed
If you do not have Argo CD configured you can watch part 2 of this series and set it up quickly in the Kubernetes cluster.
Setting Mongo Database

Now firstly, we will set up mongo database which will manage our database.
mongo.yaml:
apiVersion: apps/v1
kind: Deployment
metadata:
  name: mongodb-deployment
  labels:
    app: mongodb
spec:
  replicas: 1
  selector:
    matchLabels:
      app: mongodb
  template:
    metadata:
      labels:
        app: mongodb
    spec:
      containers:
        - name: mongodb
          image: mongo
          ports:
            - containerPort: 27017
          env:
            - name: MONGO_INITDB_ROOT_USERNAME
              valueFrom:
                secretKeyRef:
                  name: mongodb-secret
                  key: mongo-root-username
            - name: MONGO_INITDB_ROOT_PASSWORD
              valueFrom:
                secretKeyRef:
                  name: mongodb-secret
                  key: mongo-root-password
---
apiVersion: v1
kind: Service
metadata:
  name: mongodb-service
spec:
  selector:
    app: mongodb
  ports:
    - protocol: TCP
      port: 27017
      targetPort: 27017
In the above YAML file, we have created a container using the mongo database using the publicly available mongo database image and exposed it on 27017 port .
After the --- we have mentioned service in Kubernetes to expose our mongo database using the service feature of Kubernetes.
Setting up configMap
As we have created a mongo database but we cannot directly use the mongo database in our mongo express application as it can cause error when the container running the mongo database goes down so new IP will be assigned so we are using the URL instead of IP address.
mongo-configmap.yml:
apiVersion: v1
kind: ConfigMap
metadata:
  name: mongodb-configmap
data:
  database_url: mongodb-service
Setting up mongo secret

Before setting up the mongo express application in Kubernetes we need to define the variables like username and password. This cannot be normal text and needed to be base 64 encoded text. mongo-secret.yaml:
apiVersion: v1
kind: Secret
metadata:
  name: mongodb-secret
type: Opaque
data:
  mongo-root-username: dXNlcm5hbWU=
  mongo-root-password: cGFzc3dvcmQ=
Setting up mongo express App

Now we have defined all the necessary components needed to set up mongo express in Kubernetes. Now, our final YAML file will also contain the Loadbalancer service of Kubernetes as we could be running multiple containers and in order to balance the load in between them and make our application publicly by assigning it a public IP address. mongo-express.yaml
apiVersion: apps/v1
kind: Deployment
metadata:
  name: mongo-express
  labels:
    app: mongo-express
spec:
  replicas: 1
  selector:
    matchLabels:
      app: mongo-express
  template:
    metadata:
      labels:
        app: mongo-express
    spec:
      containers:
        - name: mongo-express
          image: mongo-express
          ports:
            - containerPort: 8081
          env:
            - name: ME_CONFIG_MONGODB_ADMINUSERNAME
              valueFrom:
                secretKeyRef:
                  name: mongodb-secret
                  key: mongo-root-username
            - name: ME_CONFIG_MONGODB_ADMINPASSWORD
              valueFrom:
                secretKeyRef:
                  name: mongodb-secret
                  key: mongo-root-password
            - name: ME_CONFIG_MONGODB_SERVER
              valueFrom:
                configMapKeyRef:
                  name: mongodb-configmap
                  key: database_url
---
apiVersion: v1
kind: Service
metadata:
  name: mongo-express-service
spec:
  selector:
    app: mongo-express
  type: LoadBalancer
  ports:
    - protocol: TCP
      port: 8081
      targetPort: 8081
      nodePort: 30000
Setting up Argo CD
There are two ways to declare your mongo application specification in Argo CD
GUI
Using GUI is easy and beginner friendly. Below are the specifications you need to mention in your Argo CD using WebUI. In our Argo CD we will l connect it to our code in GitHub for deployment. Our GitHub repo link is https://github.com/Abhishek-569/k8-config . Our code for deployment is stored in K8/ folder ready for deployment.
We can give the repo URL either in Web UI or in CLI.
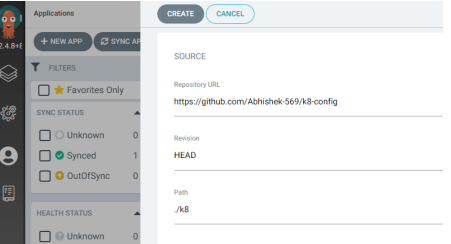 Other details are given below in argocd-app.yaml.
CLI
argocd-app.yaml:
apiVersion: argoproj.io/v1alpha1
kind: Application
metadata:
  name: mongo-app
  namespace: argocd
spec:
  project: default
  syncPolicy:
    automated:
      prune: true
      allowEmpty: true
  source:
    repoURL: https://github.com/Abhishek-569/k8-config #replace this with your repo
    targetRevision: HEAD
    path: ./k8
  destination:
    server: https://kubernetes.default.svc
    namespace: argocd
Now in the terminal type the command:
kubectl apply -n argocd -f argocd-app.yaml
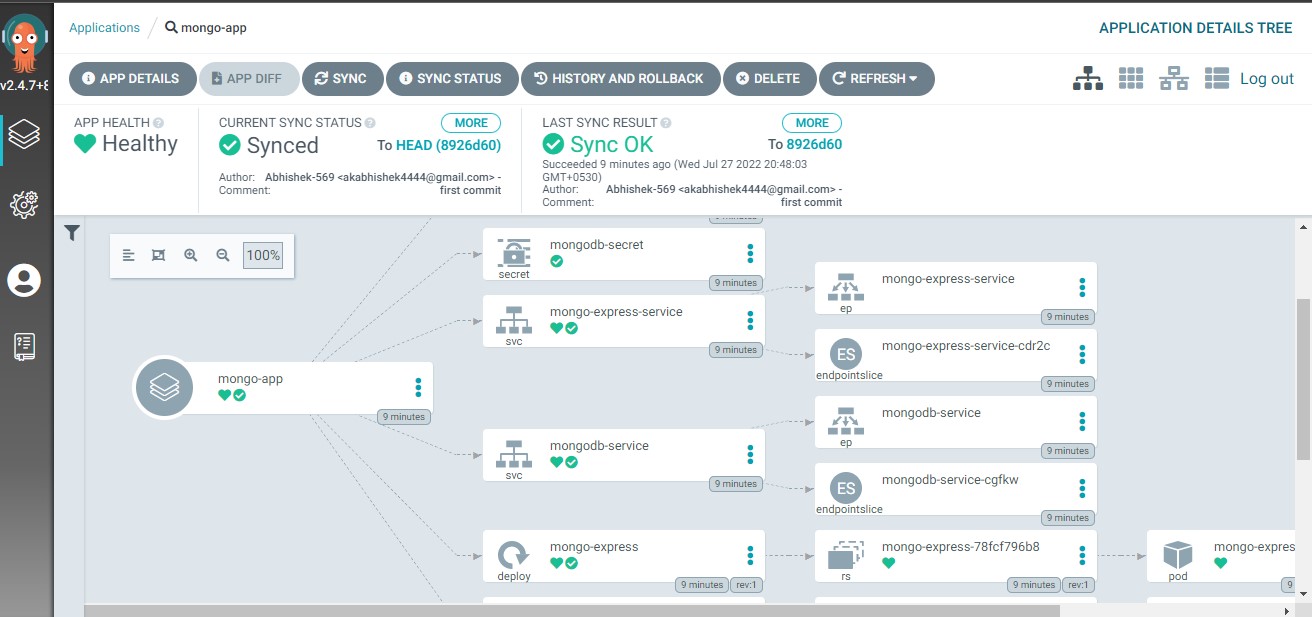
The above command will start an Argo CD and then launch the mongo app by downloading the files from GitHub first.
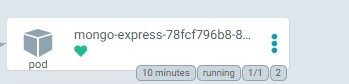
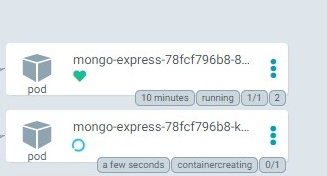
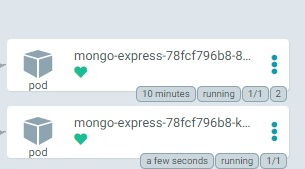
 Now to test if Argo CD is working properly or not try to change the configuration in the GitHub repo and commit it for example increase replica set of mongo express app to 2 . Try to refresh in Argo CD and see if if increases the number of container running or not.
Before Changes
After changes
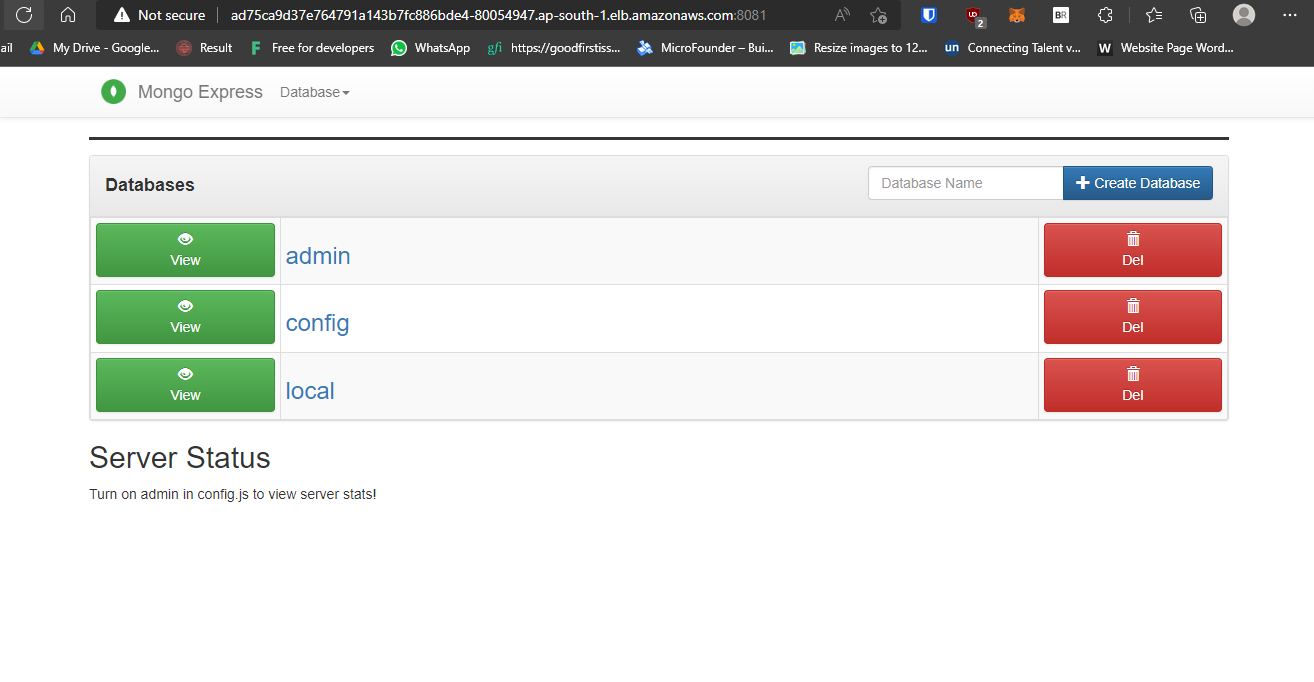
 You can access your mongo application on the load balancer Public address given by
kubectl get -n argocd svc mongo-express-service

Add port 8081 after the Public URL.
Destroy the whole setup

We can easily destroy the whole Argo CD set up using a single command
kubectl delete -n argocd -f argocd-app.yaml

Conclusion
In this tutorial first, we got familiar with how to write the K8s file in YAML related to mongo express application and then using Argo CD we applied the principle of continuous delivery in our deployment making it easy to create and update changes simultaneously.
Thank You for Reading and congratulations🎉🎉 for reading the whole part.


