How to install and run Selenium Scrapper in Flask on AWS EC2?

In this beginner-friendly tutorial, I explain how to set up a Selenium Scrapper in Flask on EC2. If you are stuck trying to do it or just beginning to wonder What is Selenium then this blog is a great place to get started.
The prerequisite to this Tutorial is just that you have a running EC2 instance on AWS and you are connected to it.
If not this will help you.
⚠️⚠️ WARNING ⚠️⚠️
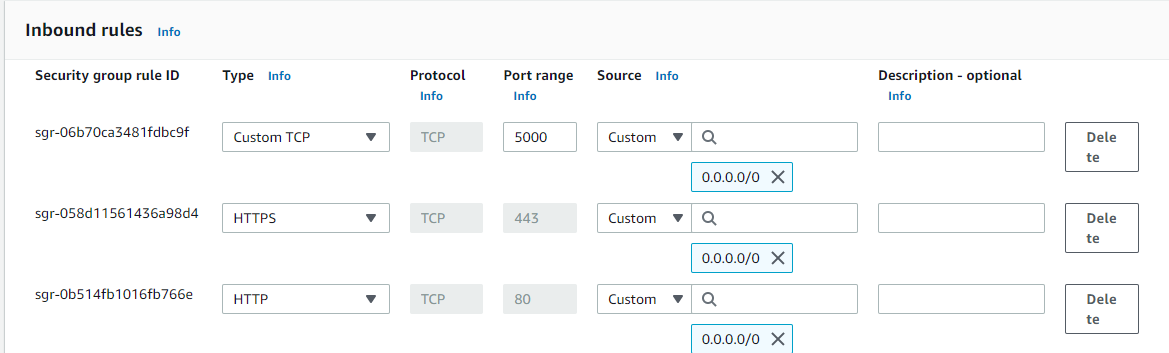
Before going ahead with this tutorial make sure that your Security Group on your EC2 instance has HTTP access from anywhere and also exposed the 5000 port number as it is very important. Else you won't be able to access the site at the end of this tutorial.
Step 1.
Start a new screen and become root user
screen
sudo su
Step 2.
Install python3 , pip, git and virtualenv
yum install python3 -y
yum install git -y
yum install pip
pip install virtualenv
Step 3.
Create a virtual environment with python3 and activate that environment. Replace 3.7 with whatever version you have. To get version use:
python3 --version
Create a new virtual env name my-app
virtualenv -p python3.7 my_app
Activate virtual env
source ./my_app/bin/activate
Step 4.
You need some browser to run webdrivers. I am using chrome browser and chrome webdriver here.
NOTE
It is important to download browser first and then identify it's version and accordingly install webdriver for that particular version. Please follow these steps carefully.
Enter the below command to install chrome
curl https://intoli.com/install-google-chrome.sh | bash
sudo mv /usr/bin/google-chrome-stable /usr/bin/google-chrome
To get the version of google chrome installed
google-chrome --verison
The above code will print the chrome version.
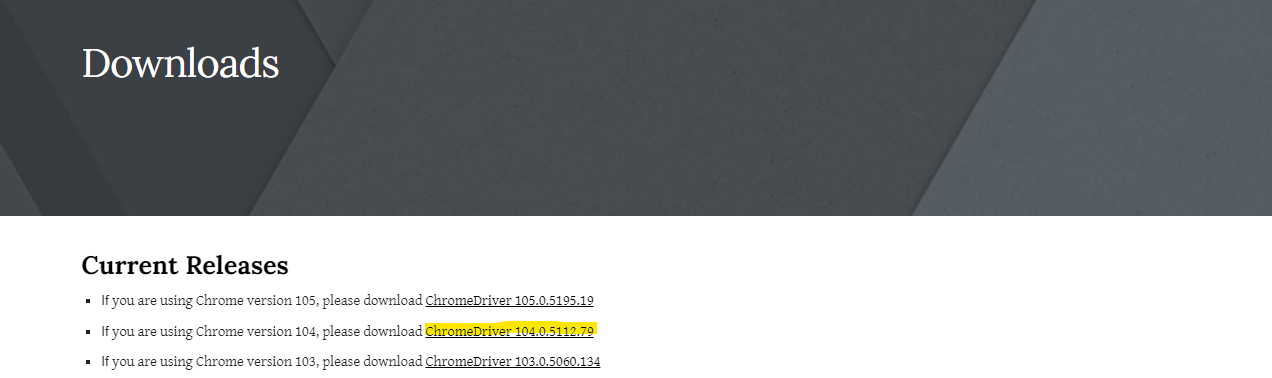
Now go to the following website to get the suitable webdriver for that particular version of chrome.
now my version of chrome is 104.
 So based on that I will select the following chrome driver
Click on your driver link and from there copy the link to Linux O.S.
 Than use the following command along with your version of webdriver.
wget https://chromedriver.storage.googleapis.com/104.0.5112.79/chromedriver_linux64.zip
unzip chromedriver_linux64.zip
sudo mv chromedriver /usr/bin/chromedriver
To check if chrome driver is installed or not
chromedriver --version
Step 5.
Install necessary python libraries
Now we will install all necessary lib in python using pip
pip install flask
pip install selenium
pip install waitress
Step 6.
Run the program
mkdir your_repo && cd your_repo/
use your fav editor to paste this code into the application.py file.
from selenium import webdriver
from flask import Flask
from selenium.webdriver.chrome.options import Options
from waitress import serve
app = Flask(__name__)


@app.route('/')
def hello():
    options = Options()
    options.add_argument("--headless")
    options.add_argument("--disable-gpu")
    options.add_argument("--no-sandbox")
    options.add_argument("enable-automation")
    options.add_argument("--disable-infobars")
    options.add_argument("--disable-dev-shm-usage")
    driver = webdriver.Chrome(options=options)
    driver.get("https://www.google.com/")
    element_text = driver.page_source
    driver.quit()
    return element_text

if __name__ == '__main__':
    serve(app,host = '0.0.0.0',port = 5000)
and run the below command in the command terminal after saving the application.py file.
python application.py
The above code will return the HTML source code of the google home page. You are basically running selenium webdriver here and getting the site data of google.com. You can change it to any website you like to scrap.
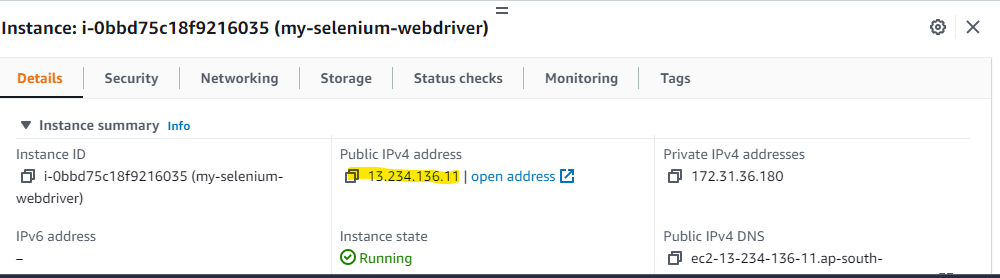
Use the public IP of your EC2 instance and add the :5000 port number in back of the Public URL.(use HTTP instead of HTTPS)

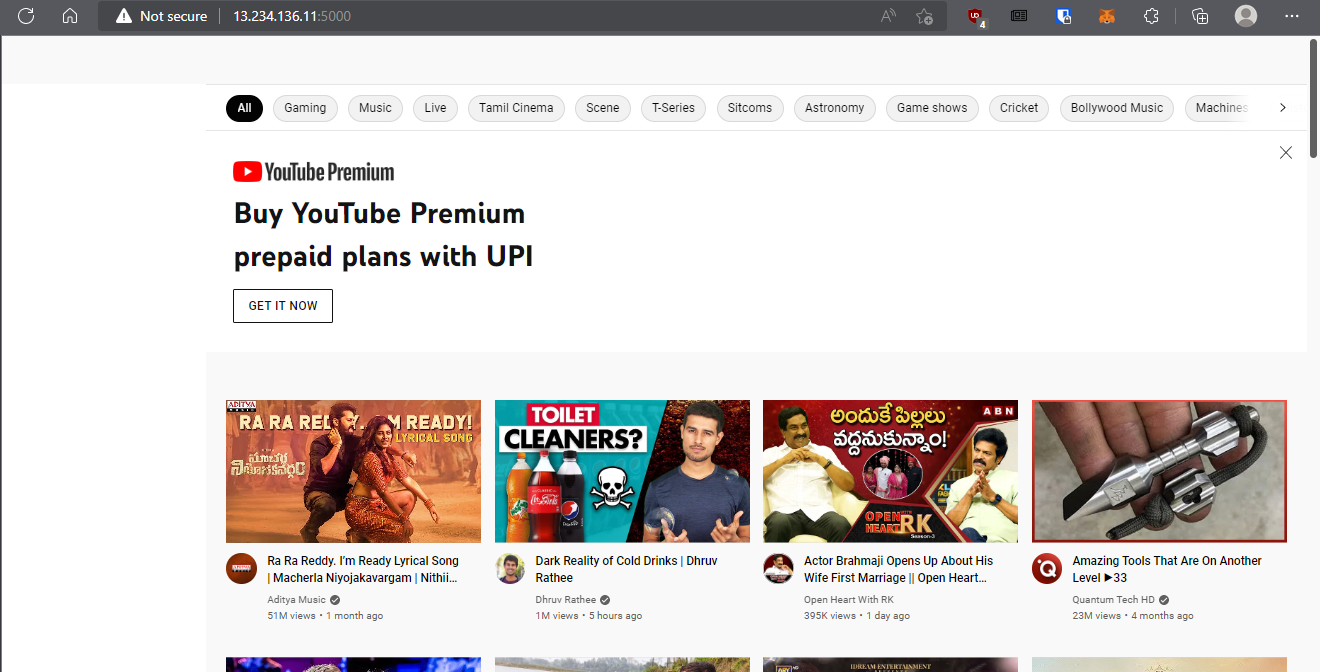
END RESULT
When the website is google.com

When the website is youtube.com
Thank you for READING 😊😊


