

Photo by Loik Marras on Unsplash
How to create a Helm Chart from Scratch?
Mastering Helm: A Step-by-Step Guide to Creating a Helm Chart from Scratch for Kubernetes Deployments


What is Helm?
Helm is a package manager tool for K8s which uses a collection of K8s resources to define an application.
Helm charts use a template approach to deploy applications. Templates give structure to projects and are suitable for any application.
Why Helm?
We have YAML files to declare our resources in K8s so why we need helm?
Helm offers several advantages that make it a valuable tool in Kubernetes deployments:
Templating and Configuration Management
Reusability and Modularity
Versioning and Rollbacks
Dependency Management
Release Lifecycle Management
Prerequisites
Access to CLI
Minikube cluster installed and configured
Helm installed and configured
Step 1.
To create a helm chart
helm create example-app

Go inside the directory created to see the files and directories created by the above command
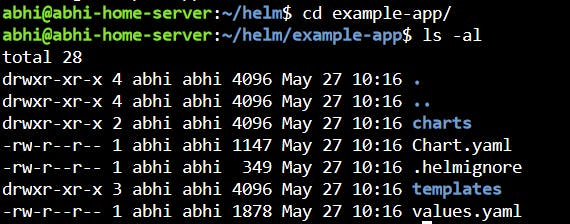
The
templates/directory is for template files. When Helm evaluates a chart, it will send all of the files in thetemplates/directory through the template rendering engine. It then collects the results of those templates and sends them on to Kubernetes.The
values.yamlfile is also important to templates. This file contains the default values for a chart. These values may be overridden by users duringhelm installorhelm upgrade.The
Chart.yamlfile contains a description of the chart. You can access it from within a template.The
charts/directory may contain other charts (which we call subcharts).
Step 2.
We will configure the imagePullPolicy to Always in this step.
Open the values.yaml in a editor and find the image values:

Now change the image PullPolicy from IfNotPresent to Always.

Step 3.
Override the chart name in values.yaml file, add values to the nameOverride and fullnameOverride:

After the values are set:

Step 4.
Change networking settings of our example-app.
We will change the networking service type to NodePort.
In the values.yml find the service value:

Change service type from ClusterIP to NodePort

Step 5.
Deploy the helm chart
helm install example-app example-app/ --values example-app/values.yaml
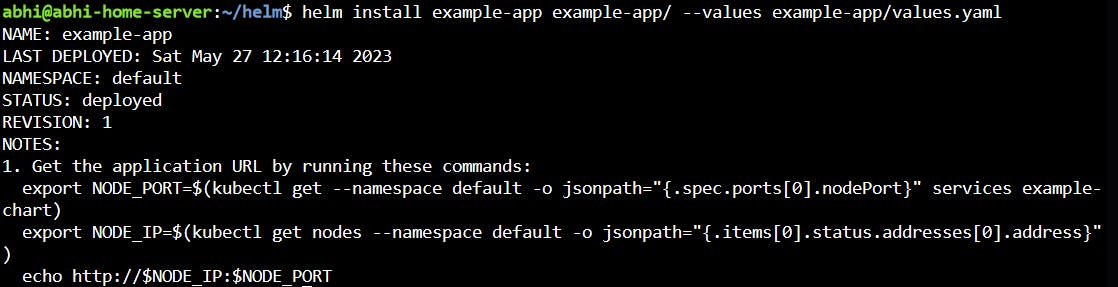
Here the helm install command deploys the app.
Step 6.
Copy the output of helm install ins previous step and run it.
export NODE_PORT=$(kubectl get --namespace default -o jsonpath="{.spec.ports[0].nodePort}" services example-chart)

export NODE_IP=$(kubectl get nodes --namespace default -o jsonpath="{.items[0].status.addresses[0].address}")

Step 7.
To view your application run:
echo http://$NODE_IP:$NODE_PORT

Go to http://192.168.49.2:32757 in your browser. (Your URL might be different)

The END